The Husqvarna brand of motorcycles and electrical equipment got its name by the town it originates from. The name stands for house mill but the early beginnings of the Swedish company had nothing to do with motorcycles or power tools and equipment. It started as a weapons factory, way back in 1689, and then in 1872, it was manufacturing sewing machines and kitchen appliances.
It wasn’t until 1903 that the company made their first motorised bicycle and the journey of these legendary motorcycles began. Husqvarna motorcycles dominated in racing competitions during the 30’s and the brand entered the world of dirt bikes in 1983.
Benefits of Motorcycle Plastics
Protection
Dirt bikes from any manufacturer are made to go through rough terrain and survive like no other bike. But in order for that to be the case long-term, you should look to invest in a plastics kit. A Husqvarna plastics kit has the necessary trim pieces that will help provide added protection for your two-wheeler. No matter what you put it against, you’ll have peace of mind.
Appearance
Husqvarna dirt bike plastics kits are not made just to protect your precious Swede powerhouse. They’re also used to make it more visually appealing. Whether or not you like to keep your Husqvarna dirt bike flashy or not, you can easily change that with the right plastics kit and retain that OEM look at the same time.
Customisability
Customising your dirt bike doesn’t get easier than when doing so with a plastics kit. You get to choose how many pieces you’ll add as well as their colour and shape. This means you get the freedom to make your Husky truly your own. Just make sure the kit you go for is compatible with the model you own.
Types of Plastics Kits
Individual
The most affordable and simplest Husqvarna dirt bike plastics kits are individual ones. These feature only one trim piece which is why they’re mainly used for the replacement of broken pieces like your front or rear fender.
Standard
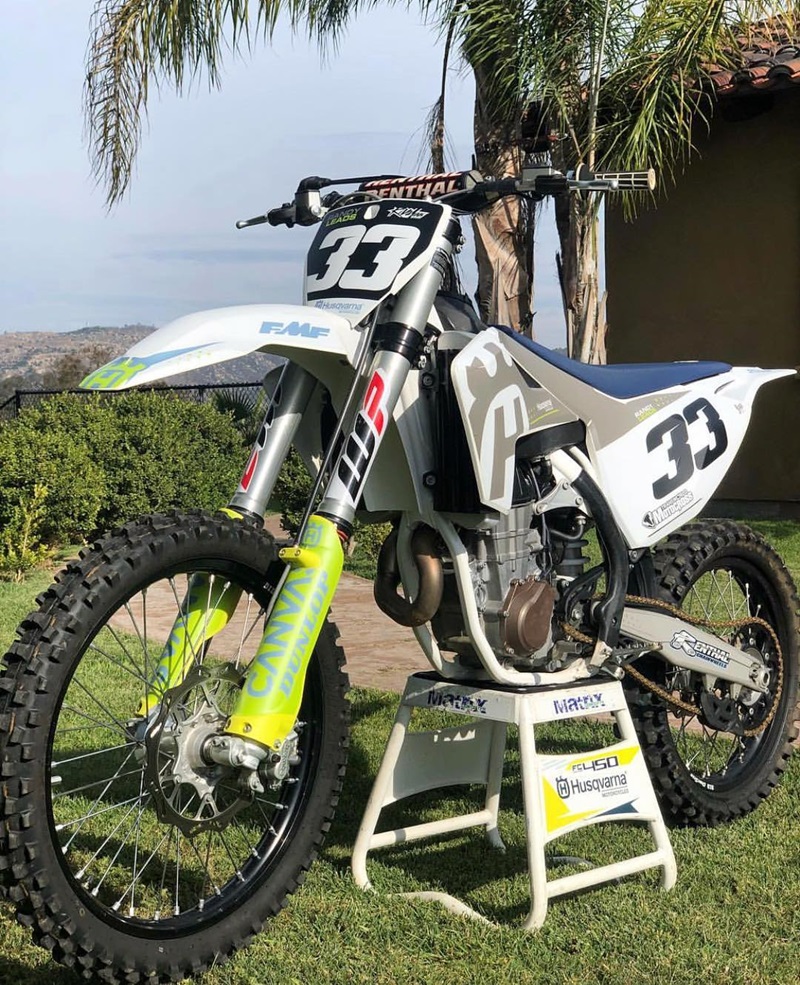
A standard or base Husqvarna plastic kit comes with trim pieces for the radiator, side panels, shrouds, air box cover and both the front and rear fender. They are also known as upper Husqvarna plastic kits.
Full
As you’d expect, with a full plastics kit you get all the trim pieces you can put on your dirt bike. These include all of the above as well as the front number plate and lower fork covers. Full plastics kits are also called complete kits.
What to Look for in a Plastics Kit
Material
The quality of the material a Husqvarna dirt bike plastics kit comes made of is one of the most important aspects you should pay attention to. Exposed to UV rays, plastic is bound to break down, but how quickly that happens is a telltale sign of the quality of the material. Lower-quality plastics are much flimsier and can break more easily while higher-quality plastics are not going to fade at all or as easily and they are much sturdier.
Thickness
The thickness of the trim pieces also affects their longevity. Thicker materials are, as you’d expect stronger, but they are not necessarily the best at surviving UV rays. Thinner plastics, although more malleable, don’t break as easily but they are not going to protect your dirt bike from flying debris as well as thicker plastics.
Finish
If you want to make your Husky stand out, the colour and design of your plastics kit are going to be the most important factor in this case. Although totally up to personal preference, this shouldn’t come to the detriment of protection.
How to Change Dirt Bike Plastics

Wash
The first thing you should do before adding your new Husqvarna plastics kit is to clean your bike. Hosing it down and going over it with warm soapy water and a sponge is going to be enough. Just don’t forget to rinse it and dry it off before you continue. If it has dry mud stuck to it, you might have to take a different route.
Remove
Next, comes the removal of the current plastics kit you have on your dirt bike. If none, then just continue with the next step. Otherwise, you should start off with the lower front fork guards and then make your way to the rear fender.
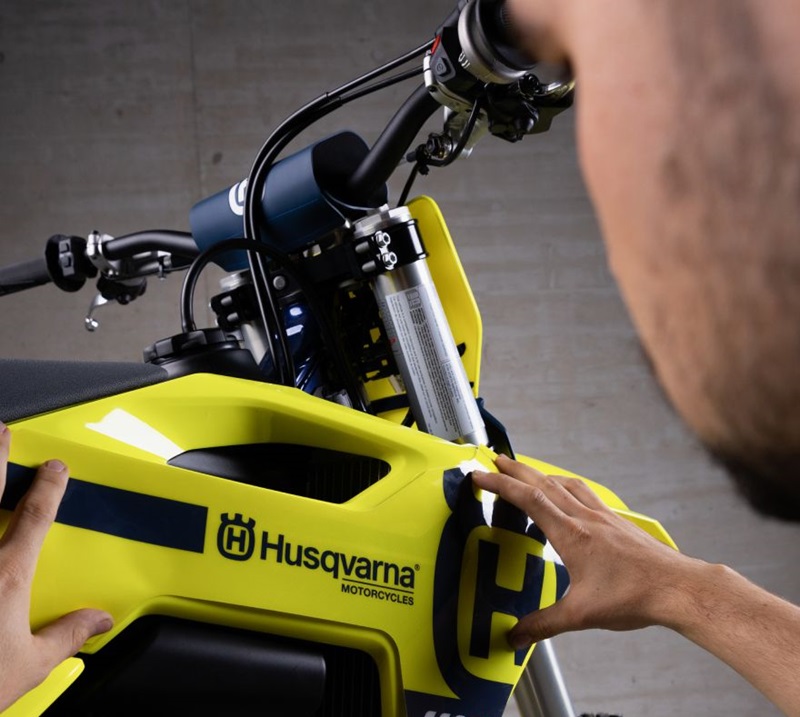
Install
To install the new trim pieces make sure to note how you remove the old ones so that you don’t struggle. You can take a video to make this easier as you’ll only need to do everything in reverse. Even better, play the video in reverse.
Decals
After you’ve installed the plastics kit, comes the final and most satisfying part and that is to apply the decals. These can be found in the plastics kit or you can purchase them separately to make your Husky a truly unique ride. Once the decals are on, get out there and give your dirt bike a spin in its natural habitat.
